
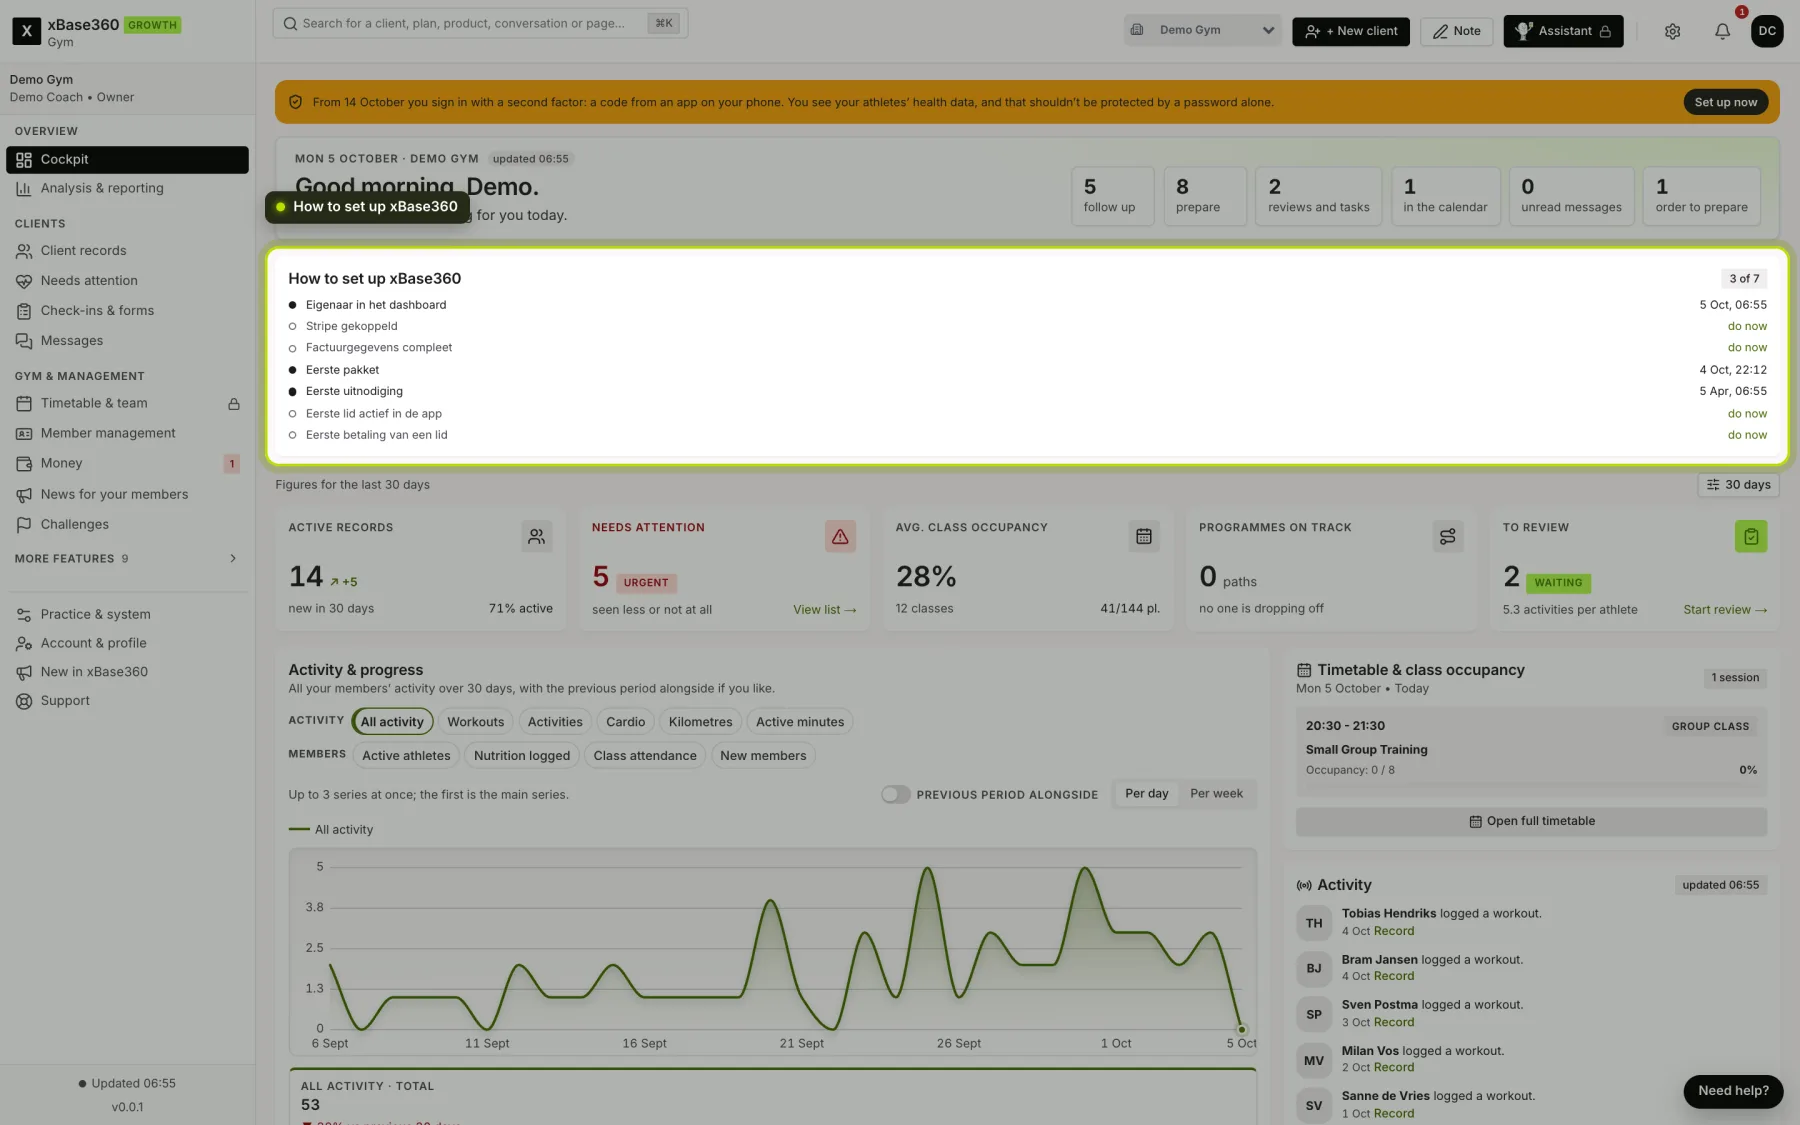
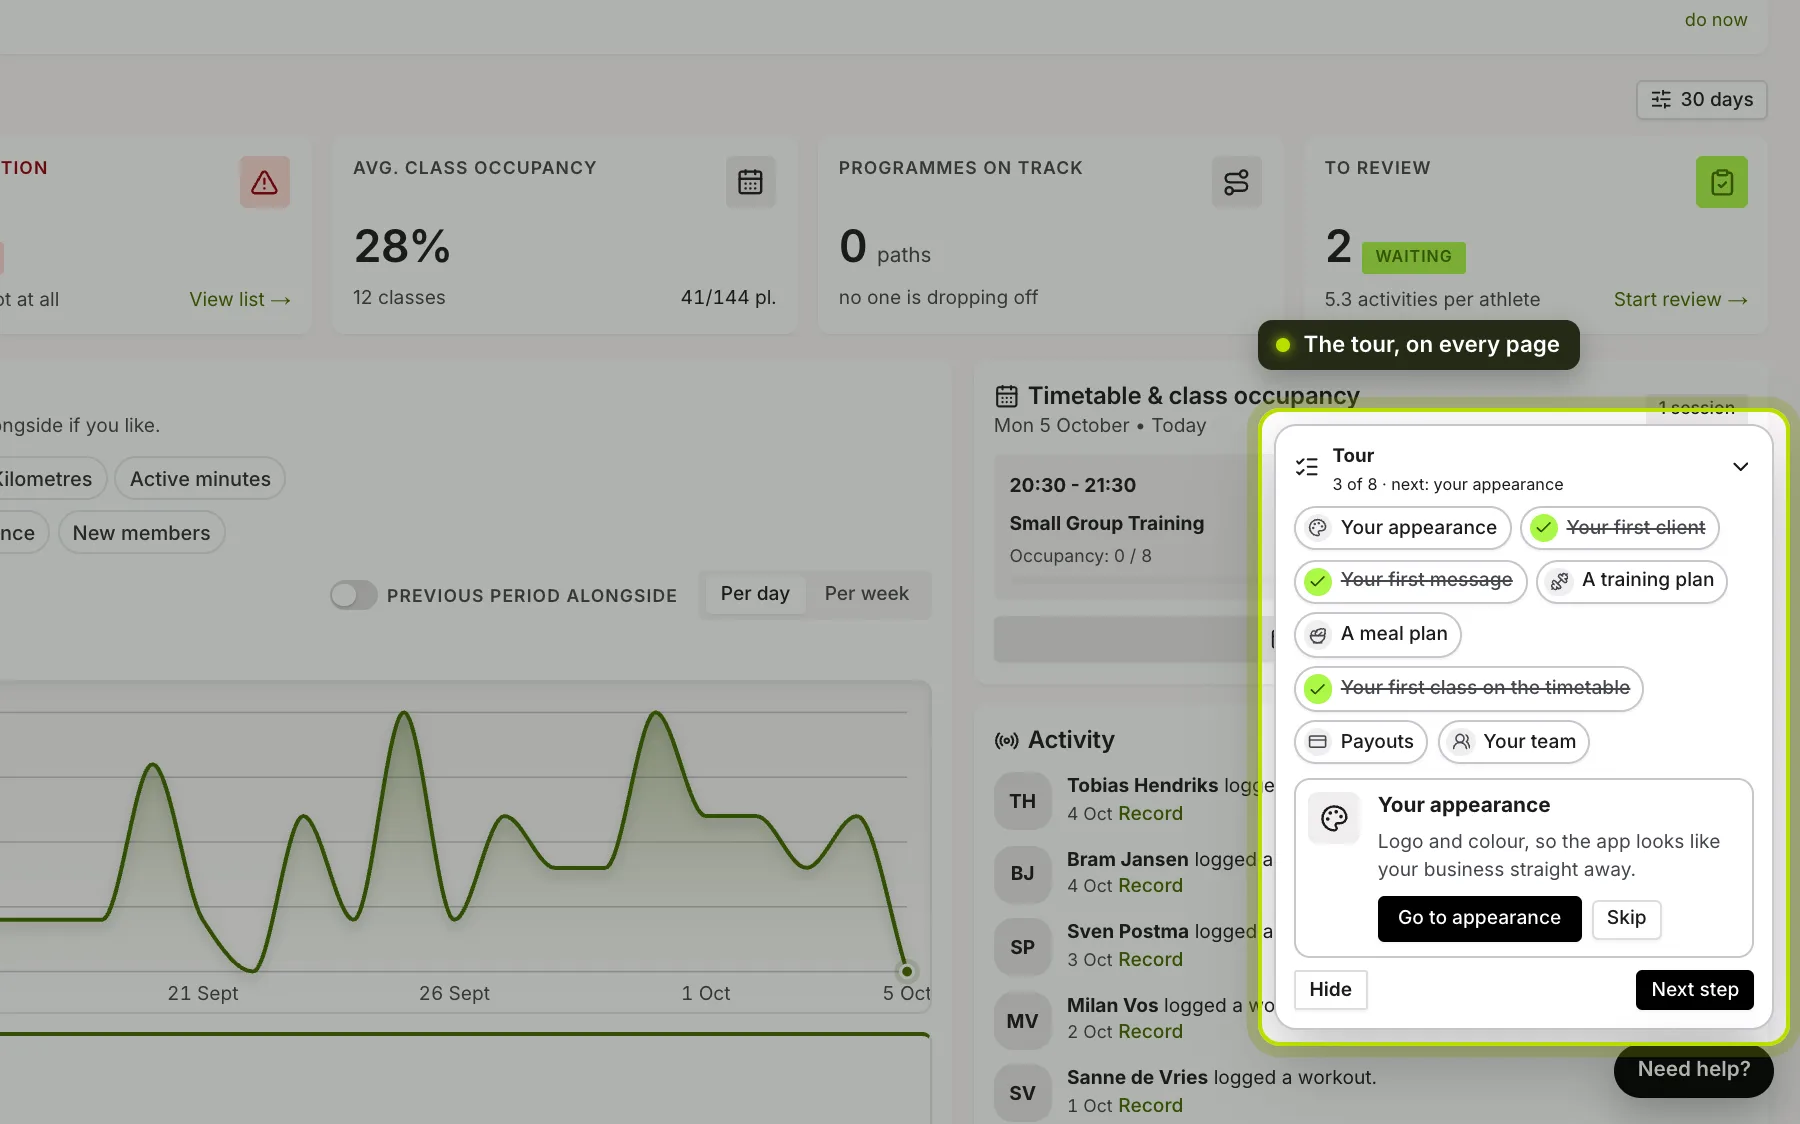
For a new business there are two helpers ready: the How to set up xBase360 card at the top of the cockpit, and the Tour at the bottom right of every page.
 (opens at full size in a new tab)
How to set up xBase360. Seven steps until your business is up and running, for the owner only:
- Owner in the dashboard. Your first time signing in.
- Stripe connected. So members can pay you online. See Connecting Stripe and setting up payouts.
- Invoice details complete. Company name, KvK number (Dutch Chamber of Commerce), address and VAT number, for the invoice with every payment.
- First plan. A subscription or punch card. See Creating subscriptions for your members.
- First invitation. A client or member invited.
- First member active in the app. Someone has opened the app.
- First payment from a member.
After each step is the date it was done, or do now with a link. Once everything is done, the card disappears.
 (opens at full size in a new tab)
The tour. Eight steps that show you the dashboard:
- Your appearance. Logo and colour, so the app looks like your business straight away.
- Your first client. Invite someone by email. As soon as they open the app, they’re in your list.
- Your first message. A welcome to your client. You can open the chat window from any page.
- A training plan. Build it yourself or with AI. Then you link it to a client.
- A meal plan. Also yourself or with AI. Your house rules for nutrition are applied.
- Your first class on the timetable. For a business with group classes. If you don’t teach classes, skip this step.
- Payouts. Sign up with Stripe, so members can pay you online.
- Your team. Invite a colleague and give permissions. Only if you don’t work alone.
Click a step for the explanation and the button to the place where you do it. With Next step you go through them in order; the header collapses the panel.
The ticks come from your own data. You don’t need to tick anything off. If there’s a client in your list, that step is done. So anything you’d already done before you saw the tour simply counts. A step that doesn’t apply to you, such as classes, you skip with Skip.
Not now. With Hide the tour disappears for a week. Once everything is in place, you complete it with Finish.
Going through it again. Under Practice & system, at Tour, Go through again resets it. Handy when a colleague joins who doesn’t know the dashboard yet.